|
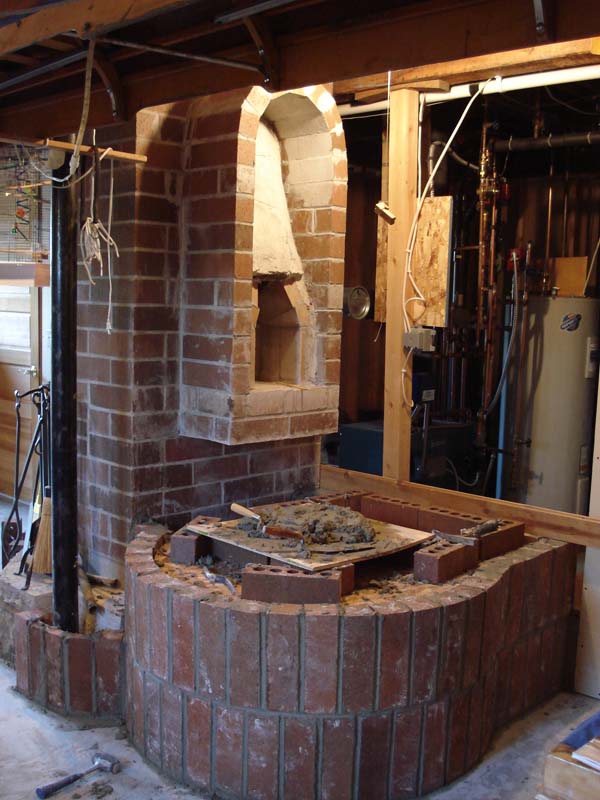
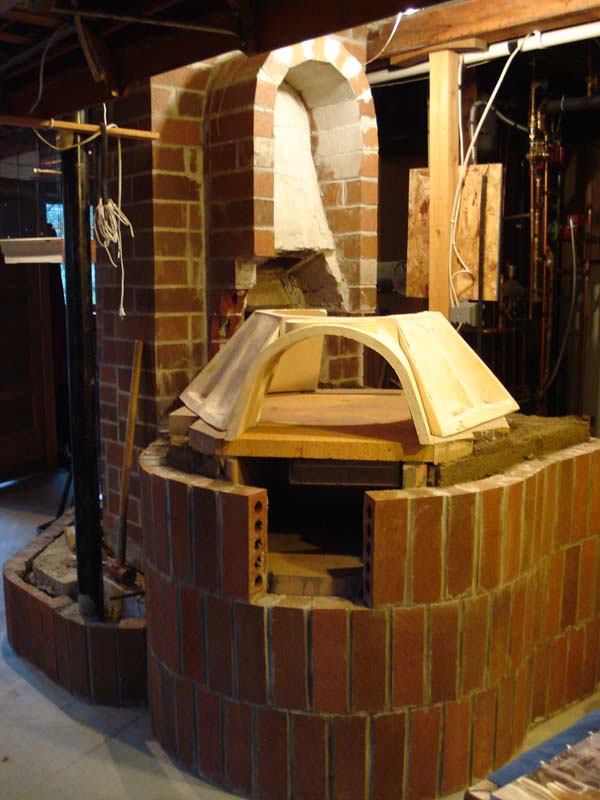
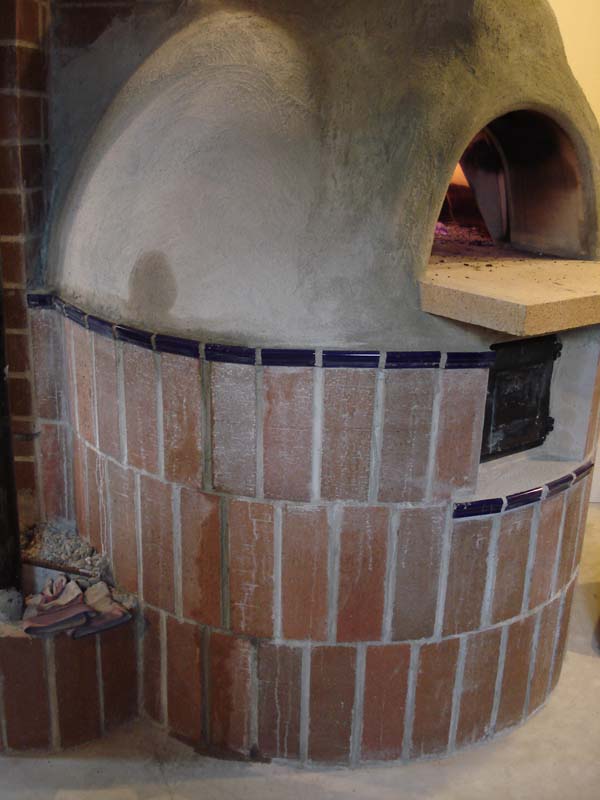
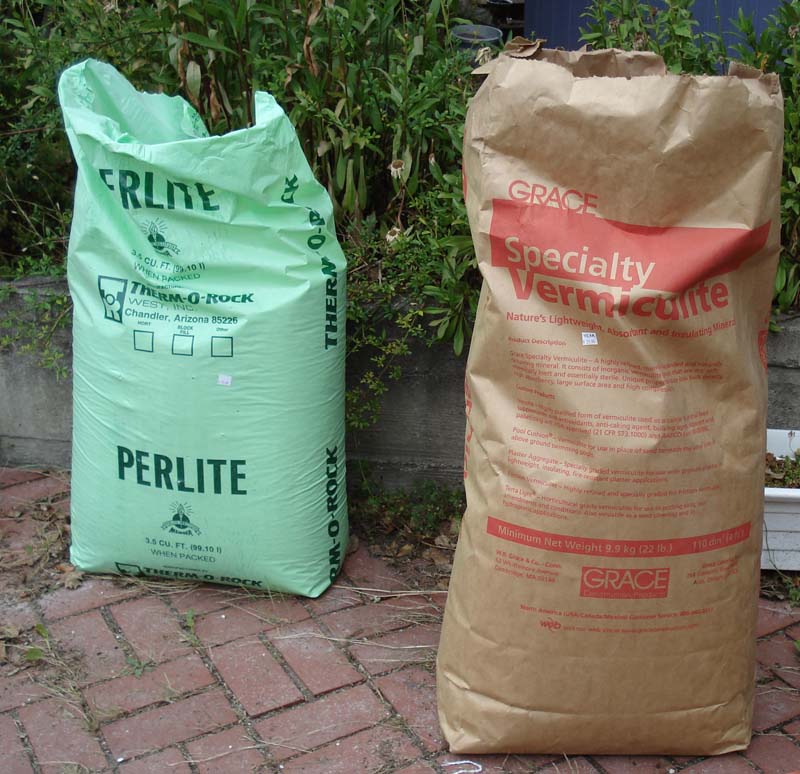
Office Oven 7/12/24 The basic plan is to replace the too-small 16" prototype oven with a Superior Clay 36" oven. The larger oven seemed to fit best obliquely behind the 30" Rumford fireplace and, to save as much space as possible, we decided to make the base circular and follow the hemispherical form of the oven. Since the flue is behind the oven, we laid the flue from the entrance tunnel over the top of the oven dome like a Mohawk haircut. At 20" above floor level we poured a 4" thick reinforced concrete base, added 4" of insulating concrete made with perlite and vermiculite mixed with one eighth part Portland cement.
|


|
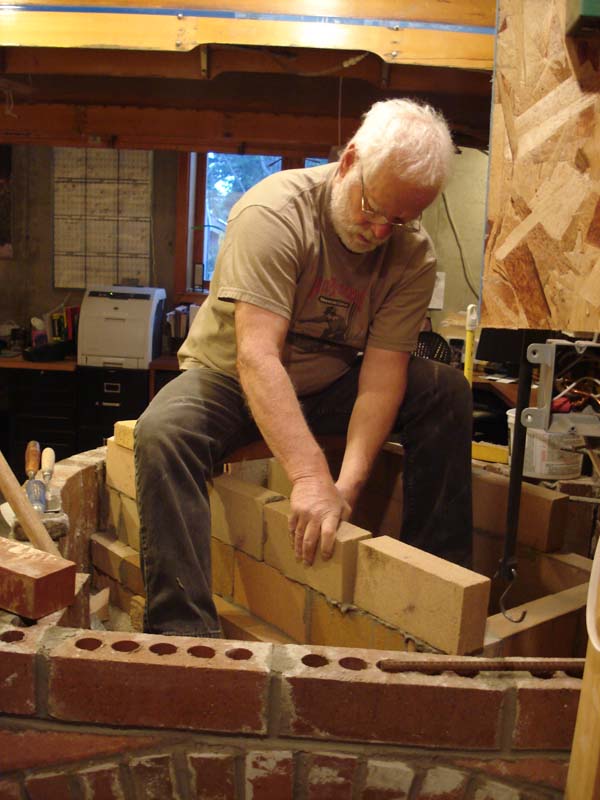
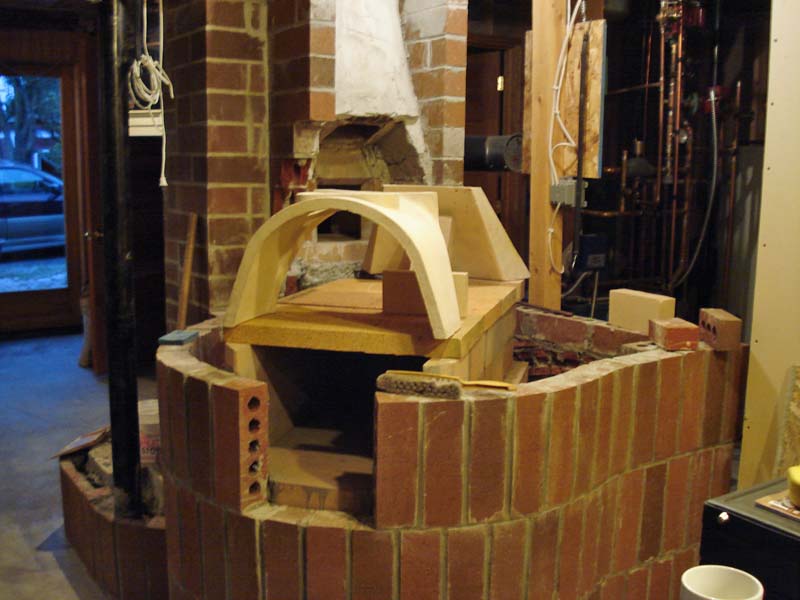
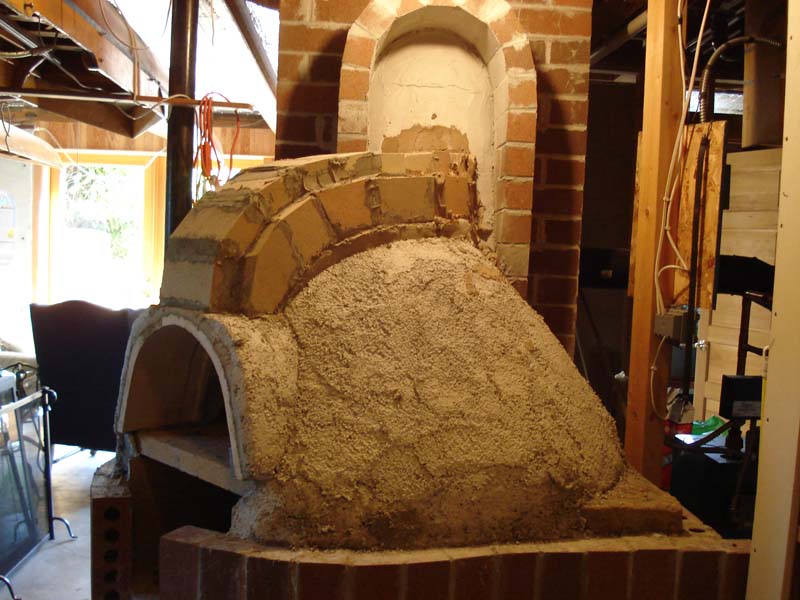
Firebox under oven - We decided after studying Larry Carnes' kiln that we would build a firebox directly under the oven. The idea is to build a fire under the oven (and maybe also in the oven) to get the temperature up high enough to use the oven as a kiln. Larry says he can get his kiln up to 2,400 deg. F. The under firebox may also heat the oven without a fire in the oven so there's more room for food or it may become an ash dump or a way to get air to the back of the oven - whatever. This is an experiment. If all fails and the oven floor caves in I can always fill the firebox and lay a new firebrick hearth. Fit - The oven sections had been around here for over a year and were broken. I fit the broken dome together as well as I could and filled the gaps and parged the whole dome with about one inch of Insulstick. Insulation - Over the clay oven liner and coat of refractory mortar we parged about 2" of DeltaCrete insulating refractory. Then we added two or three inches of the Portland/Perlite/Vermiculite concrete described below.
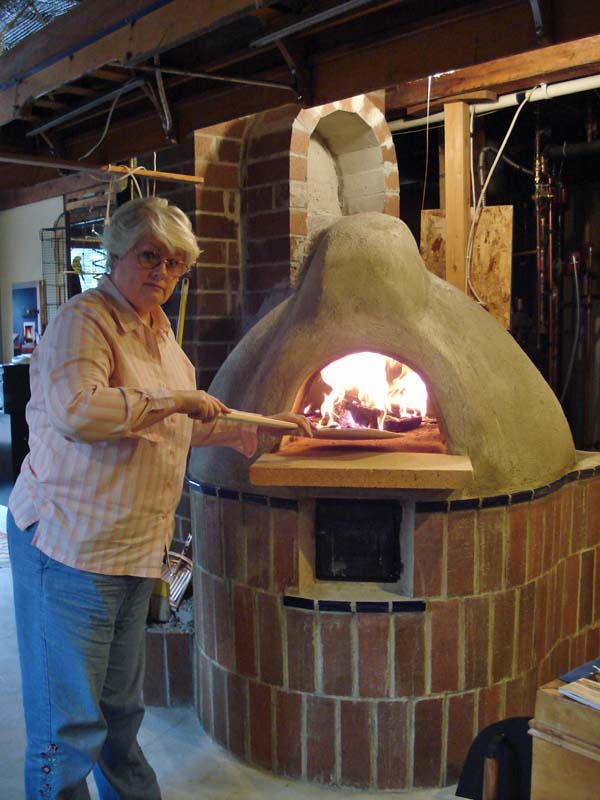
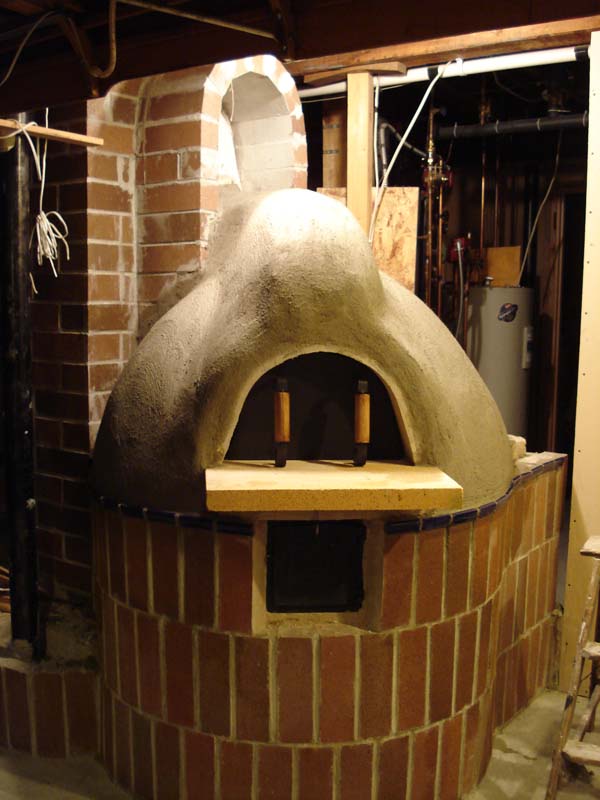
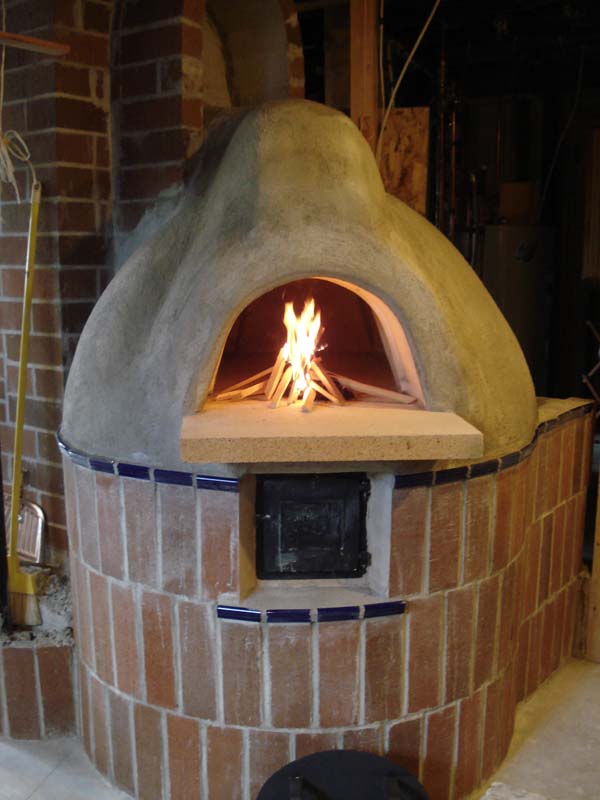
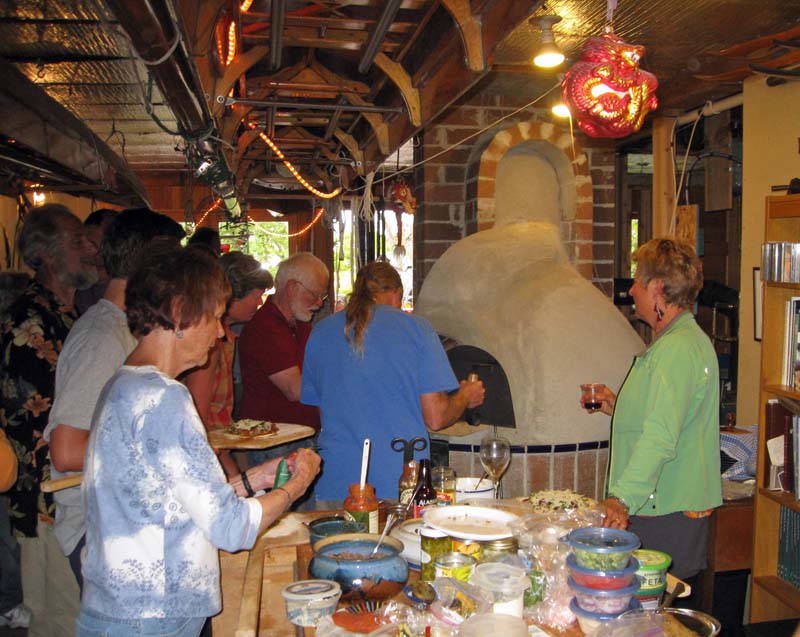
Finish - Left the washed mortar finish, blue tile trim and pizza! Break-in - The first fire we started in the oven and in the firebox underneath the hearth. It seemed to take a long time (three hours) to get up to temperature and, when we thought the oven was hot enough to cook pizza the crust burned before the cheese melted. Interestingly, water seeped out of the oven base enough so that it puddled on the floor. The oven drew perfectly. Some cracking appeared, especially near the opening where the outer shell was in contact with the tunnel liner. We filled the cracks, when hot, with pure Portland cement which seemed to work in that they did not re-appear in the next fire but left the finish sort of blotchy. The next time we decided to only build a fire in the oven, thinking that the fire under the hearth made the hearth too hot relative to the oven atmosphere. It was better but still seemed to take long time to heat up. The next two fires were day-long affairs to try to drive the water out. Probably the seeping water is the excess water used to mix the insulating pearlite and vermiculite concrete. And probably the oven isn't very well insulated as long as the insulation layer is soaking wet. The picture with the dragon is of the oven after it had been fired for about six hours. All the smoke had been burned off the inside of the oven, indicating (I think) that the walls were more than 1200 degrees F. Cracks have not appeared in the oven liner and the repaired cracks in the outer shell did not re-appear. Water still seeped out. The dial thermometer and the radiant thermometer both seem erratic. Maybe the oven is too hot for their 1,000 degree limit. Broken-in After a few fires we now can heat the oven up to "clean" (1,200 deg F) in about two hours. I give it another half hour to become fully saturated with heat - then scrape the coals to one side, wash the floor with a wet brush or rag and start cooking. At probably at least 1,000 deg. F, pizza takes about 90 seconds. As the oven cools to about 800 deg.F the pizza takes two or three minutes and maybe is more evenly done. The insulation has dried out, the seeping has stopped, there are still some cracks around the entrance and flue due to being in contact with the lining but it's great fun and a great success - and keeps the office warm.
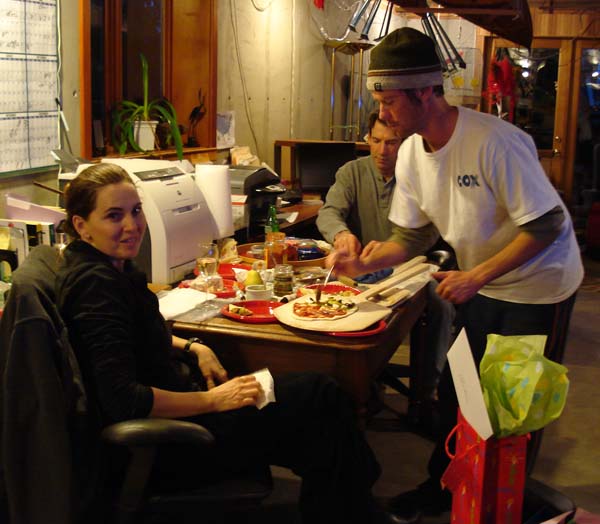
Mom's Perfect Pizza Dough (Makes enough dough for six 9inch pizzas)
5 cups unbleached all-purpose flour (see note), plus more if needed Mix 5 cups flour, salt, yeast and water with an electric mixer fitted with a dough hook until a coarse ball of dough forms. (about 4 minutes.) Let dough rest for 5 minutes. Mix again until dough clears the sides of the bowl and barely sticks to the bottom. (Beat at medium-low speed about 2 minutes. If dough is too soft and sticky to hold its shape, mix in more flour, a tablespoon at a time; if too stiff or dry, mix in more water by the tablespoonful. Let rest for 5 minutes. Mix again until dough is slightly sticky and supple, 2 to 3 more minutes. If dough is too soft to hold its shape, mix in more flour by the tablespoonful; if too stiff, mix in water by the tablespoonful. (Dough should be translucent when stretched.) Place dough on a floured counter, and dust with flour to absorb surface moisture. Fold into a ball and place in a bowl brushed with olive oil, turning dough to coat with oil. Cover the bowl with plastic wrap and let stand at room temperature for 30 mutes. Refrigerate overnight. (If making pizzas that day, let dough stand at room temperature for 1-1/2 hours. Punch it down, reshape it into a ball and return ball to bowl. Cover and refrigerate at least 2 hours.) The next day (or later the same day after dough has been chilled), remove dough from refrigerator 2 hours before making pizzas. It will have expanded somewhat and will be softer and more pliable. Using a plastic bowl scraper dipped in water or with wet hands, gently transfer dough to a floured counter, deflating it as little as possible. With a pastry blade or knife dipped in water, divide dough into 6 equal pieces. Gently round each piece into a ball and rub with olive oil. Line a baking sheet with parchment or a non-stick silicone baking liner. Brush with olive oil. Place dough needed to make, pizzas today on the sheet and loosely cover sheet with plastic wrap or a food grade plastic bag; refrigerate if not using within 2 hours. Place extra balls in individual zippered freezer bags; refrigerate or freeze. Use refrigerated balls within 2 days and frozen balls within 3 months. Let dough stand at room temperature for 2 hours before making pizzas. Note: If desired, substitute a little wholewheat or other wholegrain flour up to 1 tablespoon per cup for the all-purpose to give the crust a countrystyle taste. First time I made this I was on my not buying groceries until we used up all our stores kick so, being short of flour, I added a fair amount of soy flour and oat flour - maybe as much as a half-cup apiece. Worked great! 9/5/17
Five gallon pail method: "It's the temperature", says Angela - 75 deg. No-Knead Bread - NYT 1) In a large bowl combine flour, yeast and salt. Add 1 5/8 cups water, and stir until blended; dough will be shaggy and sticky. Cover bowl with plastic wrap. Let dough rest at least 12 hours, preferably about 18, at warm room temperature, about 70 degrees. 2) Dough is ready when its surface is dotted with bubbles. Lightly flour a work surface and place dough on it; sprinkle it with a little more flour and fold it over on itself once or twice. Cover loosely with plastic wrap and let rest about 15 minutes. 3) Using just enough flour to keep dough from sticking to work surface or to your fingers, gently and quickly shape dough into a ball. Generously coat a cotton towel (not terry cloth) with flour, wheat bran or cornmeal; put dough seam side down on towel and dust with more flour, bran or cornmeal. Cover with another cotton towel and let rise for about 2 hours. When it is ready, dough will be more than double in size and will not readily spring back when poked with a finger. 4) At least a half-hour before dough is ready, heat oven to 450 degrees. Put a 6- to 8-quart heavy covered pot (cast iron, enamel, Pyrex or ceramic) in oven as it heats. When dough is ready, carefully remove pot from oven. Slide your hand under towel and turn dough over into pot, seam side up; it may look like a mess, but that is O.K. Shake pan once or twice if dough is unevenly distributed; it will straighten out as it bakes. Cover with lid and bake 30 minutes, then remove lid and bake another 15 to 30 minutes, until loaf is beautifully browned. Cool on a rack. Note: By baking in pot may keep atmosphere more steamy. Maybe finish on oven hearth after 30 min. - Jim Neapolitan Pizza Dough - Aaron
|
|
PIZZA INGREDIENTS
Dough |
Sun-dried tomatoes Mushrooms Onions Peppers Garlic, roasted Spinach Red sauce (marinara) Pesto Sausage Pepperoni |
Superior Clay Bake Ovens
Buckley Rumford Fireplaces
Copyright 1995 - 2024 Jim Buckley
All rights reserved.
webmaster