[
I've documented your project at http://www.rumford.com/Holland.html
Hope that's okay with you. I don't have as good pictures of a five
foot Rumford going up and I think your pictures will be helpful to
others.]
So, having "studied" on the 200# flues, how did you get them up?
Looks like a couple of steel studs and a fence stretcher?? You must
know that little tune, "Give me a lever and a place to stand".
<<<<
We would be happy for you to use the photos as you were a LOT of help when we
were starting to look at building our "FIRST" fireplace. One correction
though -- AR stands for Arkansas - vs- Arizona and this (AOL) is the best
email address to use.
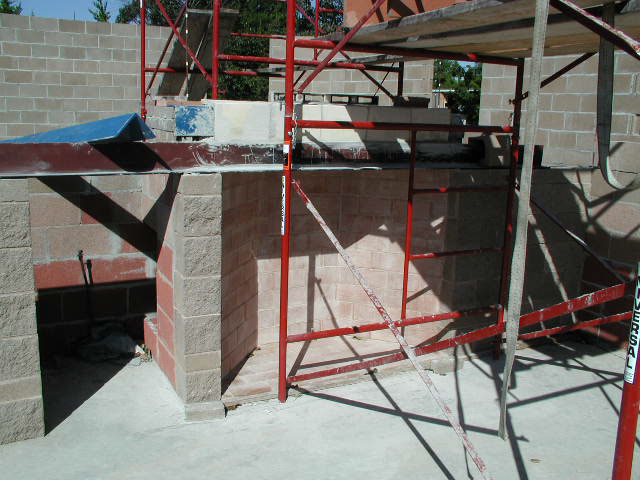
As for getting the flues up (we just set the 2nd today) we purchased several
sections of Universal Scaffolding to use while building the house. The are
standard 5' sections. We also had two high strength 3"x6" x 16' aluminum box
beams (before we got them from salvage they were railroad crossing arms). We
bolted the two beams together and placed them on top of the scaffolding (now
3 sections high or 15'). We placed a chain around the beams to provide a
hanger for one of our 3000 lb come-alongs. We use a heavy nylon web (with
ratchet) on the flue section. Hooking the cable hook of the come-along in
the web, we then hoist the flue sections up to the level needed -- then slide
a scaffolding walk way into place at the level of the top flue and lower the
flue onto that. Then it is just a matter of setting the new flue section up.
We use thin wooden shims to hold it up until we can pack the seam with fire
clay mortar.
We only set one section at a time, then we build the surounding chimney up to
that level. The chimney corners are filled with rebar and mortar and the
area around the flue is filled with mortar and broken concrete block
material. Since the house is requiring approx. 10,000 blocks (split-flace on
exterior), we have plenty of rubble to use.
We have also modified the standard installation in one other area and that is
the use of a second steel lintel for the back support of the smoke chamber.
We did this for two reasons: 1. When we saw the total weight we would be
working with we wanted to be sure it was well supported. The second is I
wanted to have access to the back of the firebox where I was running in a gas
line. Therefore, the firebrick back and the backup brick do NOT support any
weight other than their own. When I got up to the throat pieces I used a
6"x6" x3/8" lintel to span the 5' opening and hold the throat. Then, I built
up the sides supporting the front lintel so I could set a second lintel
across the back to provide a level base for the smoke chamber sections. Once
the back lintel was in place I built the firebrick/backup brick up to the
lintel and filled the final seam with fireclay mortar (I am mixing my own
mortar using Superior Fire Clay and Type S mortar). I now have enough space
between the backup brick and the back of the chimney that I can have access
to the back of the firebox. This is made possible through a opening in the
side wall where I spanned the opening using the same lintel material. I will
attach one pic to show the back side of the smoke chamber. The blue support
is the 6x6 back lintel.
If you wonder, all of the wall in the house are concrete block - it is a
"high-mass" design. The exterior walls are made of 8" insulated split-face
(color in) block seperated from an inside 8" block wall by 2" of polyiso
insulation (total thickness of exterior wall is 18"). The exterior wall will
be filled with perilite. The inside walls are also 8" block. All interior
walls will be plastered. The pad is 5" thick with 3/8" rebar on 12"x12"
centers. There is an infloor radiant heat cable (19 cables total) attached
to the rebar.
If we can be of ANY assistance to you are anyone building a similar project -
please don't hesitate to contact us.
Garay & Pat Holland
garayh@live.com
Bee Branch AR, 72013