Carpenter-Built Rumford
(Carpenter and fine art photographer
With Concrete Enclosure
1/11/19
|
Jim, Find below an old thread (one of many) to 'jog' your memory on my project. I'm the retired contractor/carpenter who lives on the Oregon coast. You inspired me to build a concrete Rumford on my own and I promised photos. I started this project in 2016 and I apologize for the delay, but another project kept me from gathering my thoughts and organizing the attached photos.
If all 47 images don't come through, let me know and I will resend in batches.
Cheers and thanks again for all your inspiration and help,
|
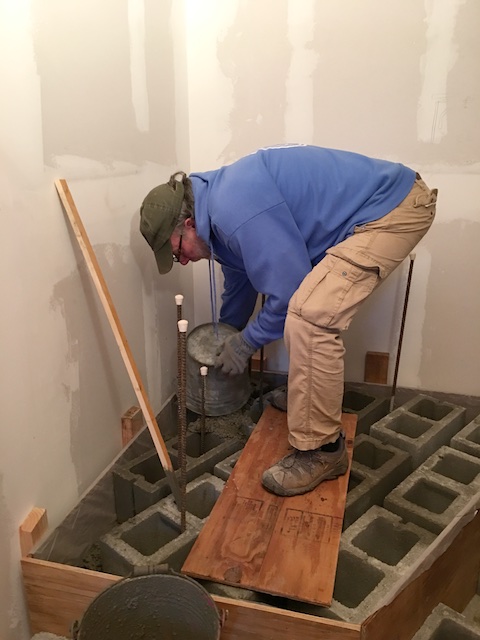
 Base to room addition
Wall goes up and hearth inside
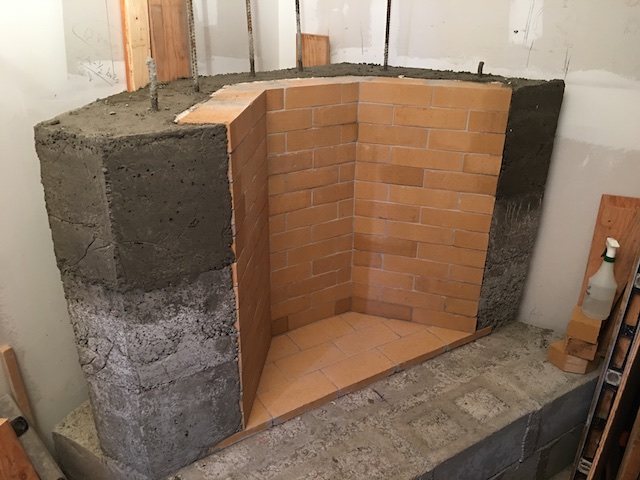
Firebox
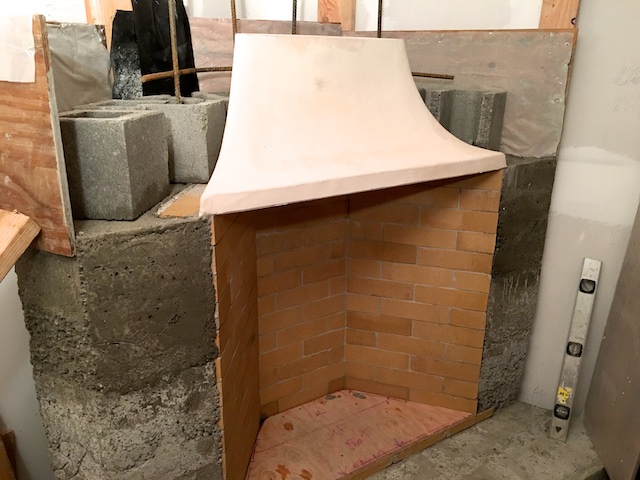
Throat enclosed
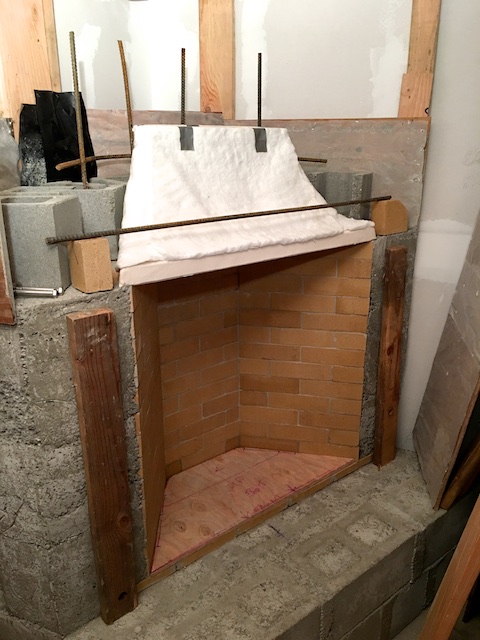
Throat finished and damper set
Smoke Chamber and Flues
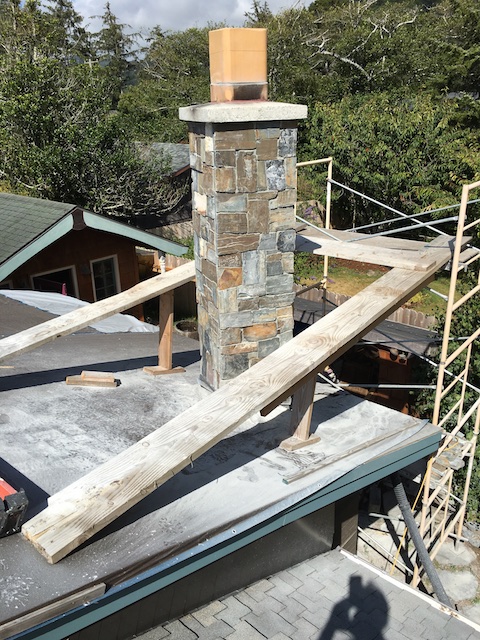
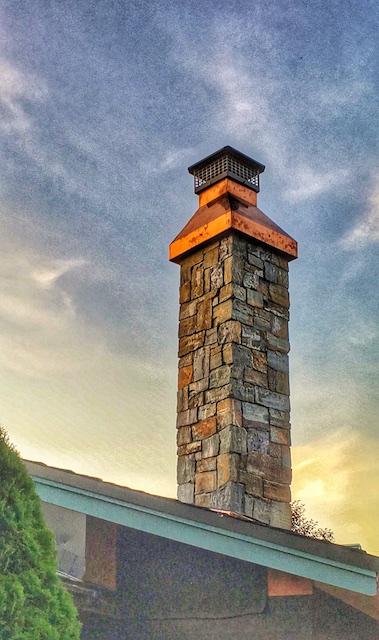
Chimney and drip edge
Chimney and drip edge
|
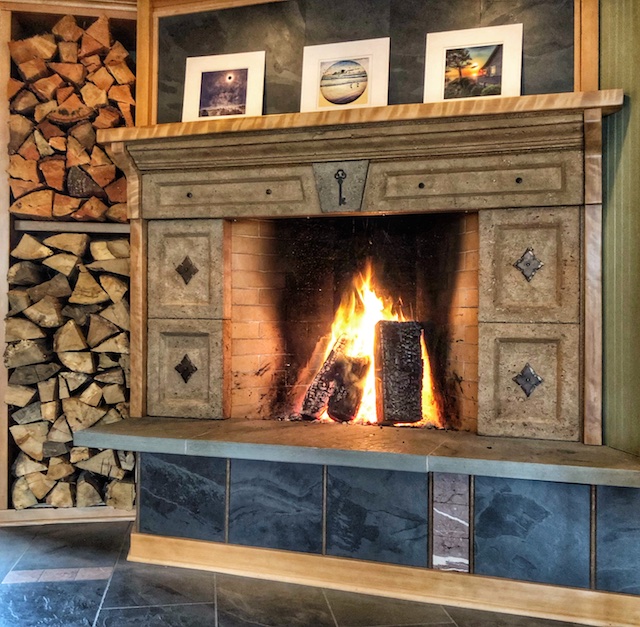
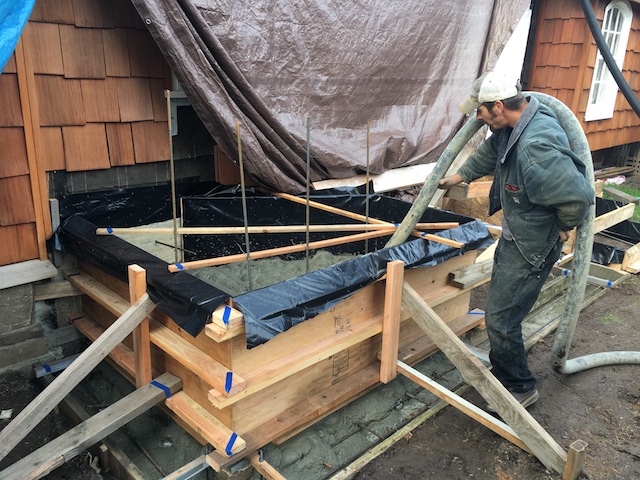
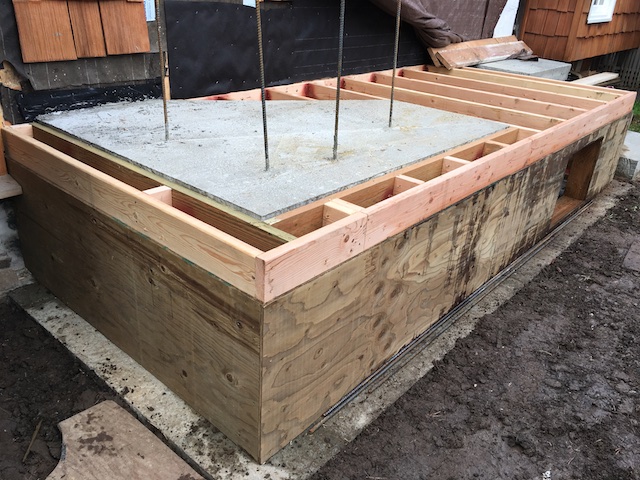
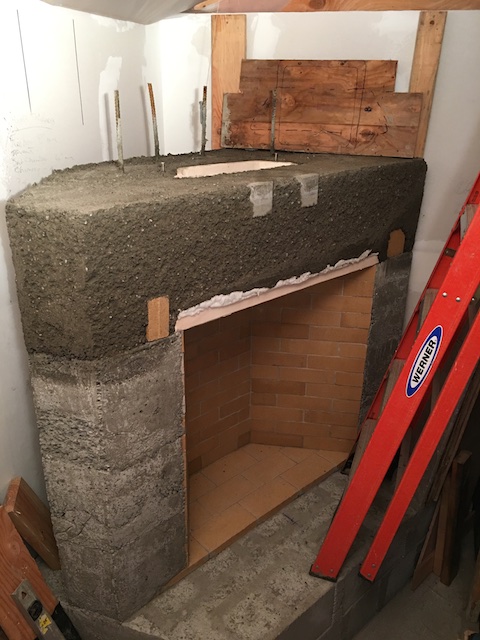
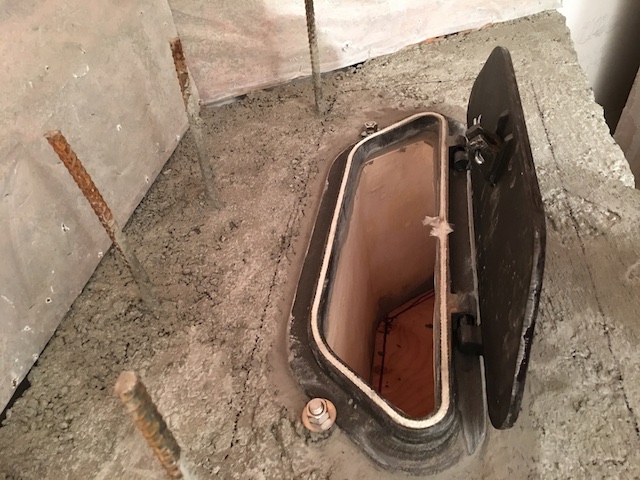
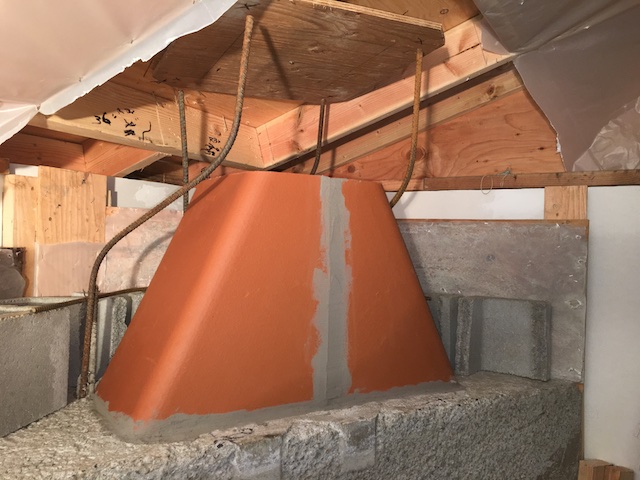
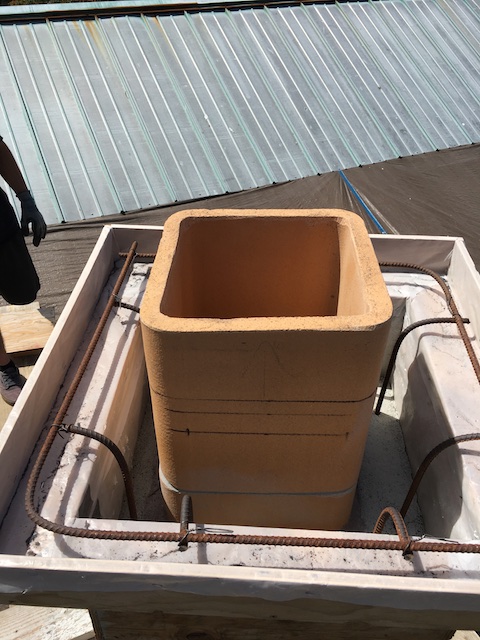
Here is my story: A Carpenter-built Concrete Rumford Fireplace I am a retired building contractor and carpenter, not a mason. Intrigued by the 'Rumford Fireplace concept I began investigating the process and getting bids from masonry contractors. But when confronted with a cost of $20,000 to build a new fireplace, I turned to Jim Buckley for advice. When Jim learned that I was a carpenter planning to build the plywood concrete forms for the foundation work, he suggested I consider building my own concrete Rumford in a 'slip form' style. Once I studied the component assembly process, I decided to give it a go. With Jim's generosity of both email and phone time, I was able to plan and execute a 'Carpenter-Built Concrete Corner Rumford' as follows: I decided early on to encompass the new masonry on the interior of a 6' x 12' alcove addition to my living room. In lieu of the code minimum 12" thick fireplace footing, I opted for a whopping 3' deep form as I was pumping concrete anyway for the wall footings and an adjacent 2-yard concrete stair form. As concrete is relatively cheap, I wanted to simply build plywood box forms instead of cutting and mortaring concrete blocks. So 6 yards of pumped concrete later, I was ready to start on my raised hearth. With my wife running the 1-bag mixer, I first filled each of the 2 raised-hearth plywood forms with random concrete block as a low-cost displacement technique - meaning less bags of concrete to mix and pour. It still took 3o bags of concrete to fill the raised hearth forms, but the 2 pours went relatively quickly. After the raised hearth forms were stripped, it was time to learn how to work with refractory mortar and firebrick. I angle cut the intersecting corners with my wet saw and laid up the brick without a form so I could clean my face joints as I went. I then lined the back side of the firebrick wall with 1/2" ceramic fiber blankets and built a 12" tall plywood perimeter form which I re-used for 3 solid concrete 'lifts' to finish flush with the top of the firebrick. Then came the 1-piece throat, more ceramic fiber blanket and another pour to provide a level surface for both the damper and the smoke chamber installation. A couple more form pours encased the smoke chamber and I was ready for flue tiles and the roof penetration. As I was planning for a stone veneered chimney, I made the first plywood form 2" larger in dimension to provide for a stone 'shelf' as well as an integrated slot for counter flashing. That first form was also angle topped to match the pitch of the roof. From here up it was flue tile, ceramic fiber wrap, re-bar extensions with horizontal ties every 18", and 4" thick concrete lifts at 18" tall (each ~4 bags of pre-mix) until I was approximately 9' above the smoke chamber. Each form-pour lift was small as I was working alone and wanted to keep the job manageable. Then to the last form I added a 3" x 3" 'shoulder' so as to provide an overhang to protect the stone veneer. By using re-bar and a mono-pour for this cap, I then trowel-sloped the top surface up to the flue tile. This solid shoulder cap and protruding flue tile was then covered with a copper chimney shroud and cap for water protection of the entire chimney core. Working alone in conjunction with winter weather interruptions, I was able to build an entire fireplace from the ground up using reinforced concrete, thereby avoiding the need to cut, mortar, and fill concrete block. I have nothing against concrete block, but as a carpenter I found it much easier to build sectional plywood box forms and to simply fill them with concrete, 100 bags in all! To finish the fireplace I opted to make my own concrete face tiles, lintel, and mantle. All 6 pieces were cast in plywood forms using rock salt for the 'travertine' rustic surface. The reinforced lintel and mantle pieces ended up weighing about 200 pounds each. Ribbon-figured maple was used for the surround trim. The end result was a cost-effective and do-able project for a guy who prefers to work with wood, table saws, and screws! (Many thanks go to Jim for his expert advice and for answering endless questions about Rumford fireplaces.)
|


|
Note: Cameron sent quite a few more pictures. Let me know if you are interested. I only picked the ones that showed most clearly how he made his slip forms, wrapped the liners with ceramic fiber paper and poured the concrete by hand with buckets. Also interesting is the construction of the chimney drip edge and the sharply sloping copper cap as per Rumfords recommendations. Great job, Cameron. Thanks. - Jim
******* Jim, Glad to hear my process met with your approval and that the photos were helpful. We've already burned through several cords of wood and love both the heat and the ambience the fireplace provides!
|

|
Cascade Head Cavort was pure serendipity: I had hiked out on to the head to photograph the sunset, and as I retraced my steps came upon 2 young women who were laughing and dancing in the twilight. I introduced myself and asked permission to photograph their silhouettes and promised to send them some images. I then noticed the crescent moon and had fun posing them for those shots. I ended up printing for each of them a poster with several of their favorite shots.
|
|
And yes, if you want to include a foot note that I'm a fine art photographer and include my website that would be great!
Cheers,
Cameron Nagel
|

Back to Concrete Enclosures
Buckley Rumford Fireplaces
Copyright 1995 - 2019 Jim Buckley
All rights reserved.
webmaster